Here we are going to give you information on the settings of LazyMerch, as well as further advice and how to approach problems.
General Settings
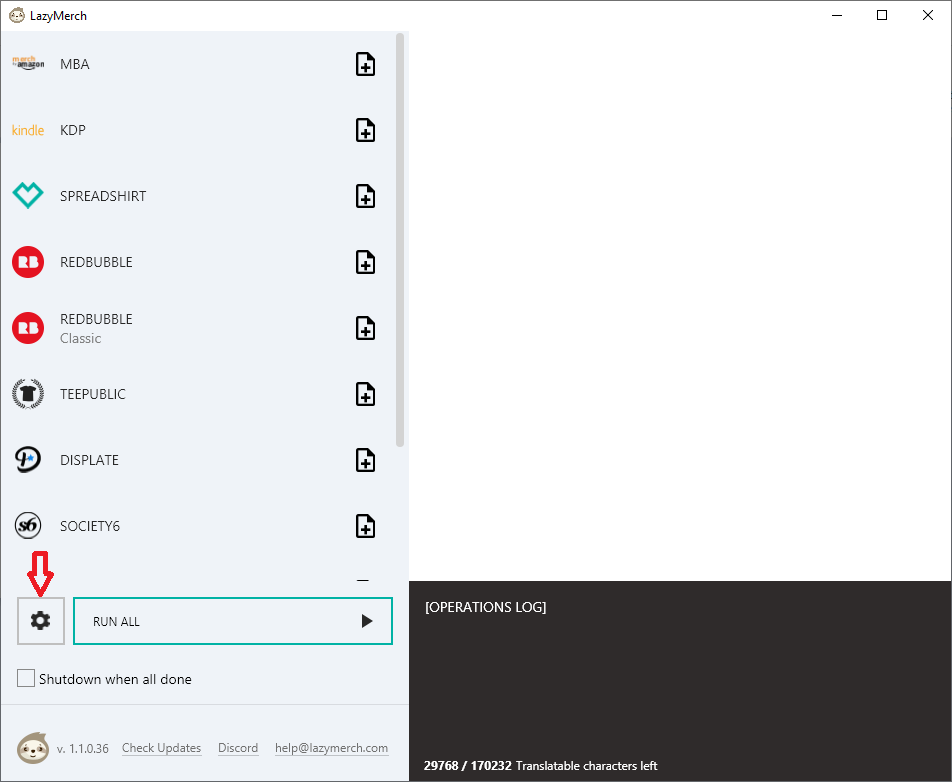
By clicking the gears icon, which is marked by the red arrow, you will get to the settings. Here you can adjust settings to your personal needs and make changes for upload processes.
General
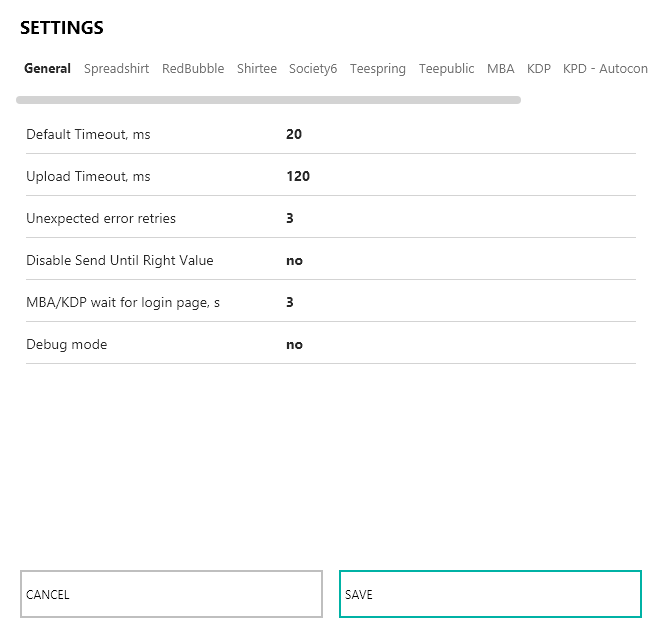
Under “General” you can change general settings. If you make changes, do not forget to click “SAVE” before you leave.
Default Timeout
The value for Default Timeout decides within seconds, how long LazyMerch is permitted to wait to perform a step. If operational processes are not properly conducted, or do not lead to an expected result, LazyMerch will wait as long as the given period. If the problem persists, LazyMerch will activate a timeout-error.
Upload Timeout
Describe the maximum value of how long the upload of a file can take in seconds. This value only relates to the upload of the design. The duration can vary depending on the file size and connection. If the upload takes longer than the given value, LazyMerch will release a timeout error and returns to the file upload until the file is successfully uploaded and no new attempts are available.
Unexpected Error Retries
Unexpected Error Retries refers to any retry the programme attempts when unexpected errors occur. In the default settings, LazyMerch undertakes 3 attempts to upload your design once again. This is especially useful, if an unexpected pop-up appears on the website of the Print On Demand provider, or if any other errors affect the uploading process. Common sources of error are incorrect spreadsheets or illicit keywords that were used in the listing. So, if your design still does not upload, despite retries, please double check your listings.
Disable “Send” Until Right Value
Because it has happened before that some POD providers prohibit certain signs in the listings, we integrated a setting for this in LazyMerch. The setting prevents that LazyMerch repeatedly retries to enter these signs. Once this option is enabled, potential incorrect signs will be skipped (e.g. special characters). However, as we try our best to spot sources of errors when uploading, this setting is usually not necessary to activate.
MBA/KDP Wait For Login Page
This value explains in seconds, how long the programme takes to access the log in page on Amazon. The given default value of 3 seconds should be enough to access the login page. If you notice longer waiting times that exceed this value, LazyMerch will mark this upload as faulty and will retry the process right away. You can select the amount of retries under “Unexpected Error Retries”. If you should notice errors more frequently, you can change the default value to a value of your choosing and try to increase the waiting time.
Debug Mode
The Debug Mode aims to avoid errors and to solve them. This mode can remain deactivated until you are told by LazyMerch’s support to activate this setting.
Spreadshirt
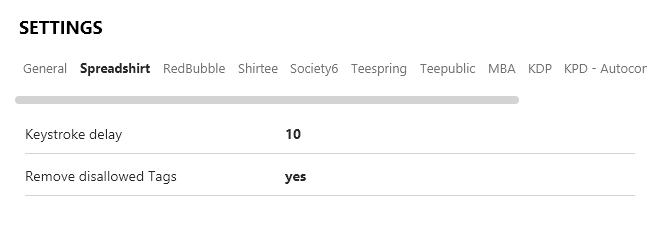
Keystroke Delay
This value shows by how many milliseconds the keystrokes ought to be deferred. This affects all necessary textual inputs, such as the title, description and the tags. The lower the value, the quicker the input.
Remove dissalowed Tags
This setting decides, whether the tags which Spreadshirt does not accept should be removed or not. It can happen that such tags are repeatedly found in listings or that they are unexpectedly declined. Therefore, we suggest that you activate this setting by choosing “yes”.
Redbubble
General
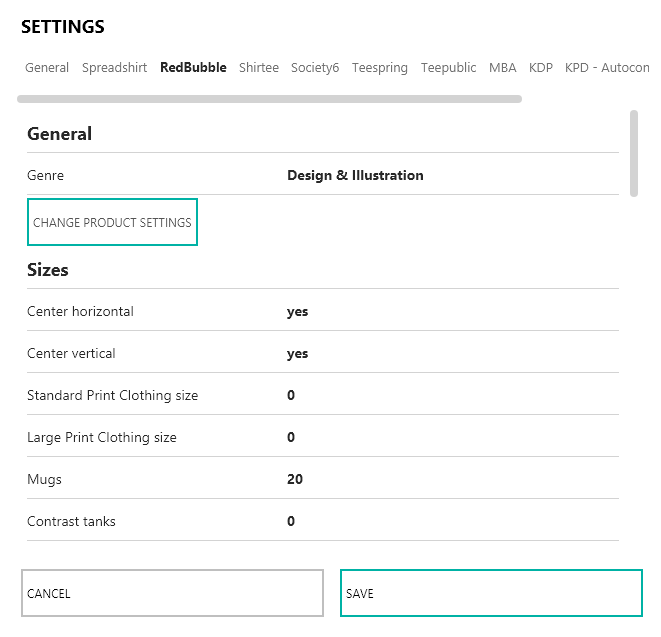
Under Redbubble’s default settings you can choose under which genre your designs should be uploaded. Additionally, there is a button to change the product settings.
Change Product Settings
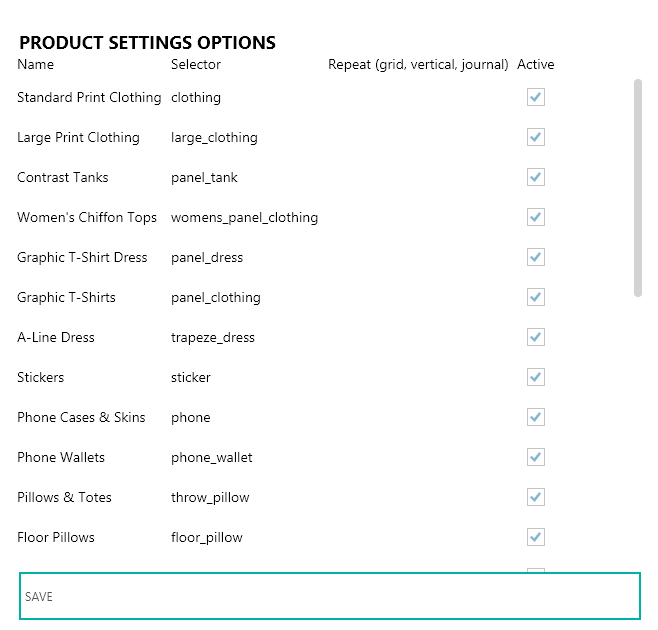
Under Change Product Settings you can choose to either select, or deselect the available products on Redbubble to decide for which available products you would like the uploaded design to be available. In the column “Repeat” you can choose the options “grid”, “vertical” and “journal” to decide how the design should be reproduced (e.g. on a phone case). We recommend that you first make yourself familiar with the available settings on Redbubble, to ensure you choose the ideal settings on LazyMerch.
Sizes
Under “Sizes” you can select whether your design should be horizontally or centred. Additionally, you can select the percentual display size of the design for each product. We recommend, that you first make yourself familiar with the manual uploading process and figure out which percentual value you would like to select for LazyMerch.
Product Selection Delays
In this section you can select the minimum and maximum value in milliseconds for the delay of the product selection. LazyMerch calculates a random value between the two bounds and selects products with a suitable pace. This helps to make any interaction with the website look as natural as possible (manually controlled).
Other Selection Delays
Here you can select the minimum and the maximum value in milliseconds for the delay of the remaining selection steps.
Default View
With “Default View” you can decide how the product should be presented to the customer on Redbubble. You can choose from all products including “Image Only”.
Auto Translation
Here you can decide, if the listings in the upload spreadsheet should be translated into different languages, or not.
Shirtee
General
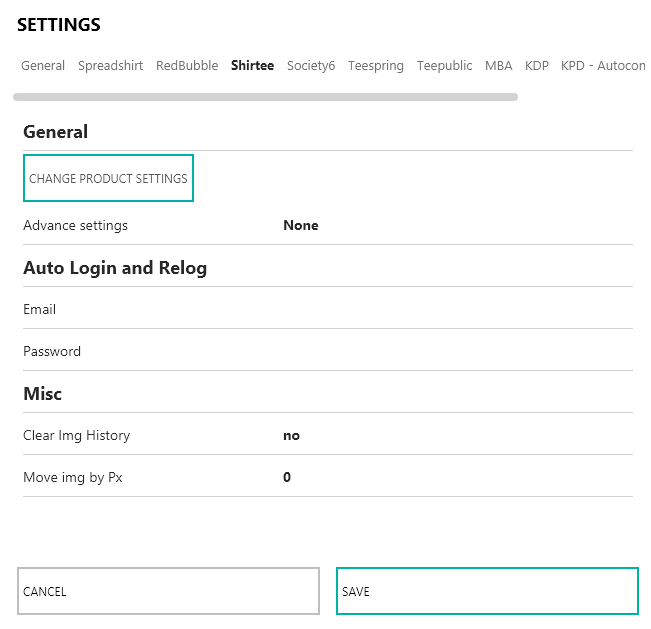
Change Product Settings
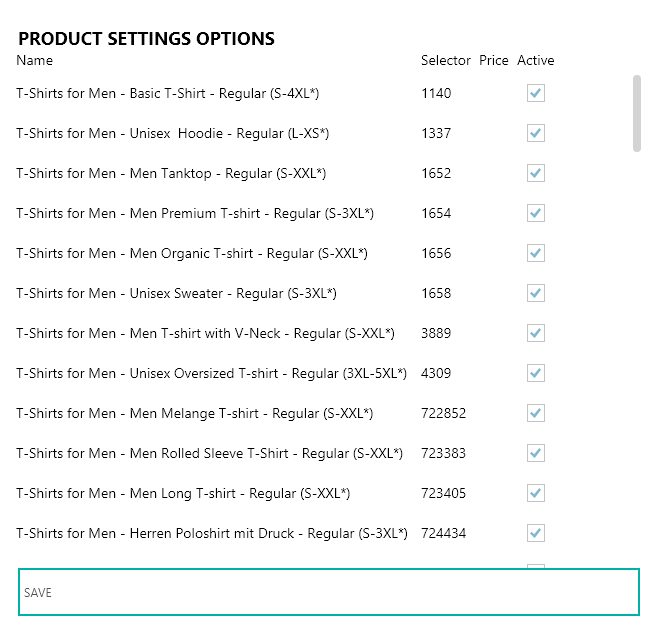
Under “Change Product Settings” you can choose or decline different products from Shirtee. Additionally, you can select the chosen price for each product. If you leave the price box empty, Shirtee’s standard prices will be selected.
Auto Login And Relog
Here you can enter the login details for your Shirtee account to permit LazyMerch to automatically log in. This is helpful in case the programme gets logged out automatically during the uploading process. With your permission, LazyMerch can login again and continue the uploading process without disruption.
Misc
Misc stands for Miscellaneous and offers you configuration options for other Shirtee related uploading methods. It is possible to remove any uploaded designs from the upload section on Shirtee or to relocate the designs to the products. The value “Move IMG by PX” is given in pixel and has a dash ( – ) in front if the design is supposed to be moved upward. Positive values bring your design downward (adding a ( + ) is not necessary).
Society6
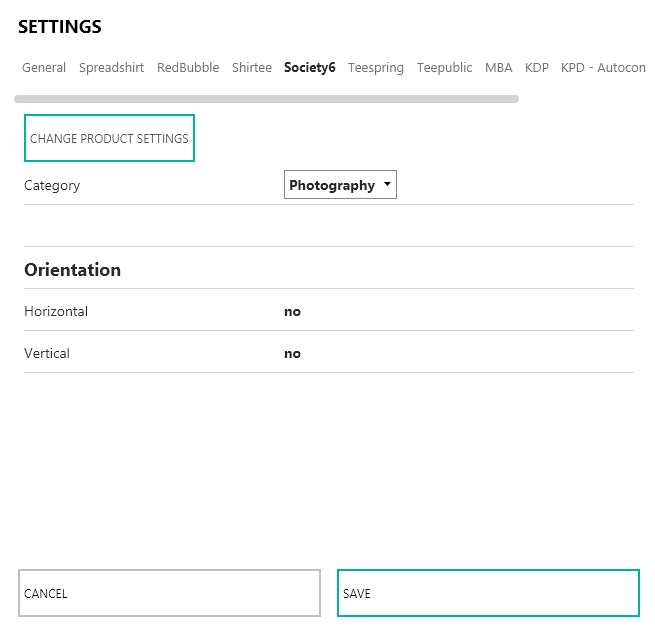
With the settings for Society6 you can select the category, in which your uploads should be uploaded. By clicking “Change Product Settings” you will get to the following view:
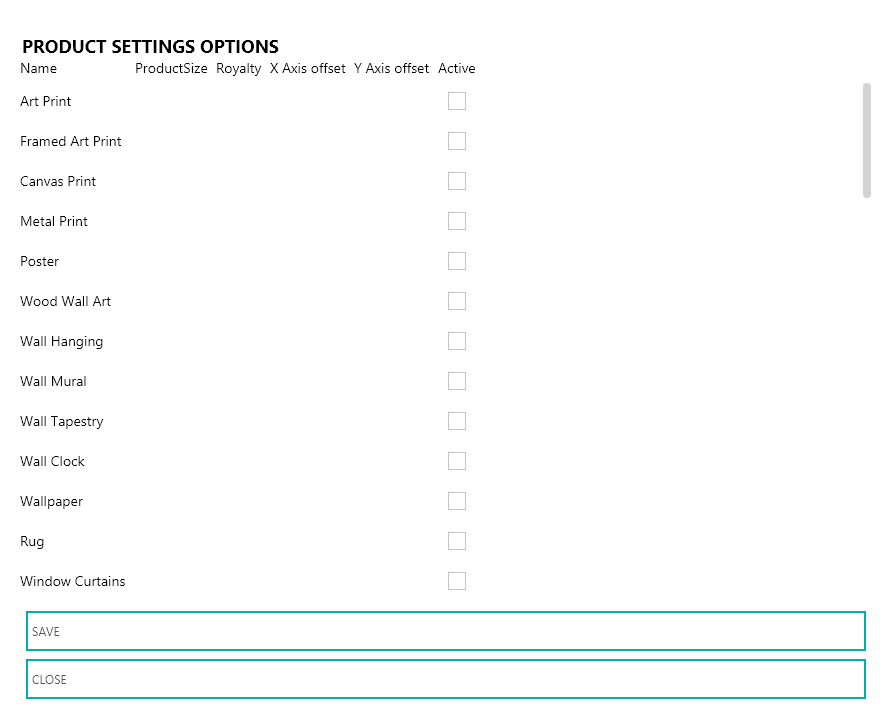
Here you select the products on which the designs should be available. You can also set the product size with a percentage value and the roaylty setting. If these fields remain empty, the default values of Society6 are used. In this case it is recommended to go through the upload process of Society6 manually and to check which values you enter in LazyMerch to get optimal results.
Another special feature of the setting options under Product Settings is that you can reposition the designs horizontally and vertically. The columns “X Axis Offset” and “Y Axis Offset” are used for this.
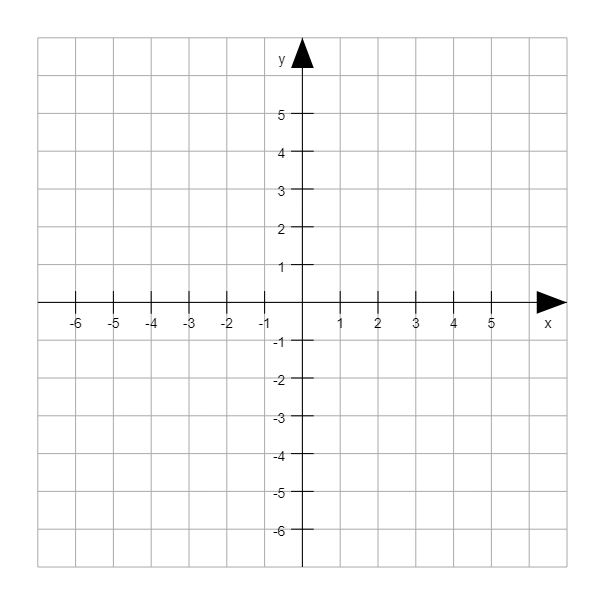
Starting from a coordinate system, the values of these columns can be filled, for example to move the design to the left. To do this, you would enter a negative value along the X-axis. To find the optimal settings for Society6, it is recommended to try different values and check, if the given value causes a satisfying positioning.
Orientation
With this option you can decide if the designs should be horizontally or centred.
Teepublic
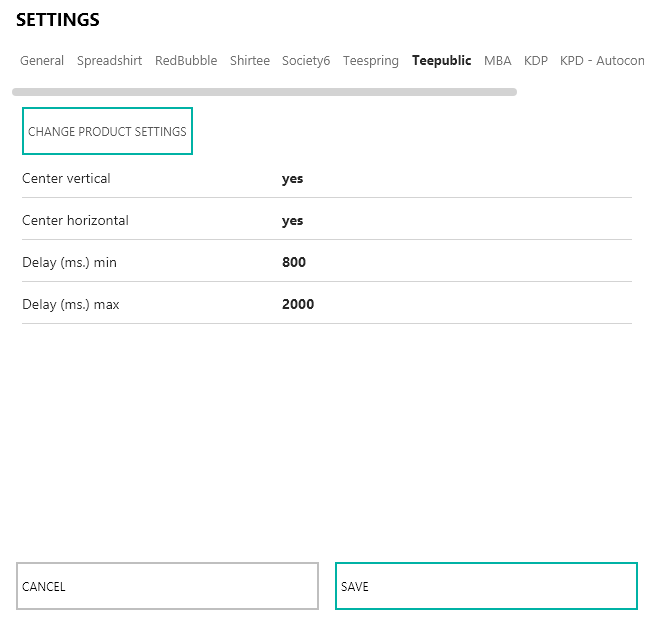
Under the settings for Teepublic you can decide, if the designs should be vertically or horizontally. “Delay (ms.) min” and “Delay (ms.) max” describes the minimum and the maximum delay of LazyMerch’s work steps in milliseconds. The programme determines a random value which lays in between the given bounds. This allows the input to look program-controlled.
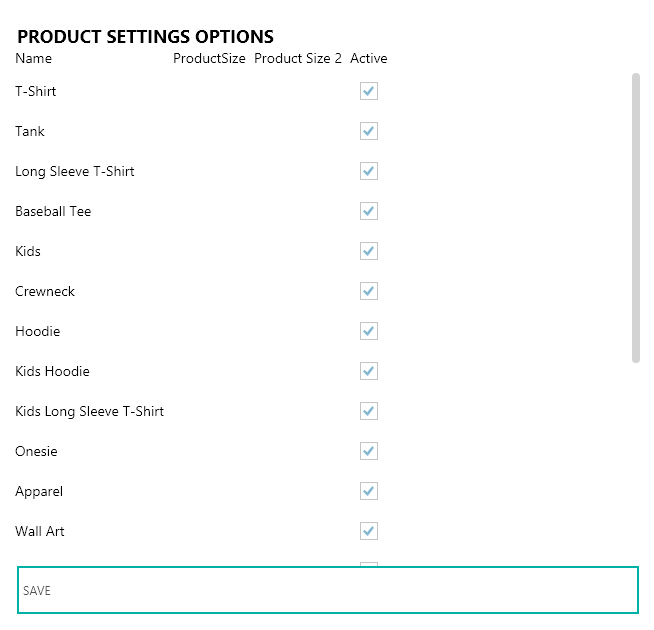
Under the product settings you can add or remove products, as well as select a percentual value for the size of the design for the selected products. As for some products you can choose between two versions, you can select the size for the second version under “Product Size 2”. We recommend, that you make yourself familiar with the manual uploading process on Teepublic, to find out which value works best and you would like to submit to LazyMerch.
Merch By Amazon
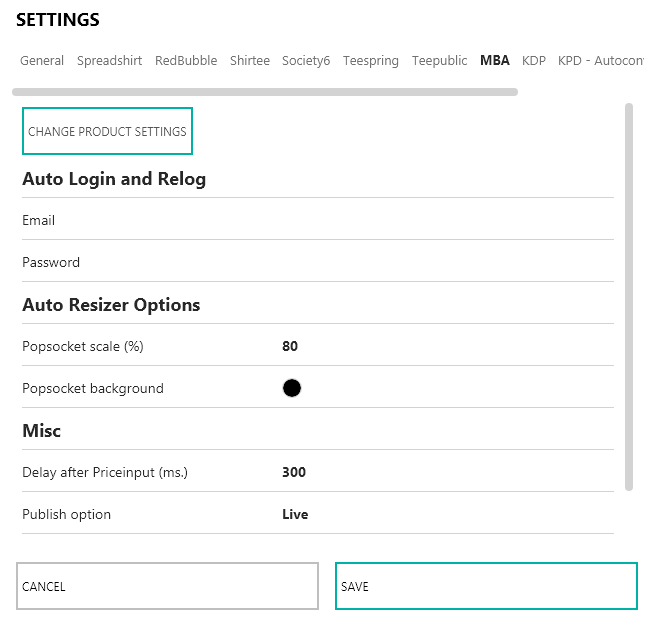
Change Product Settings
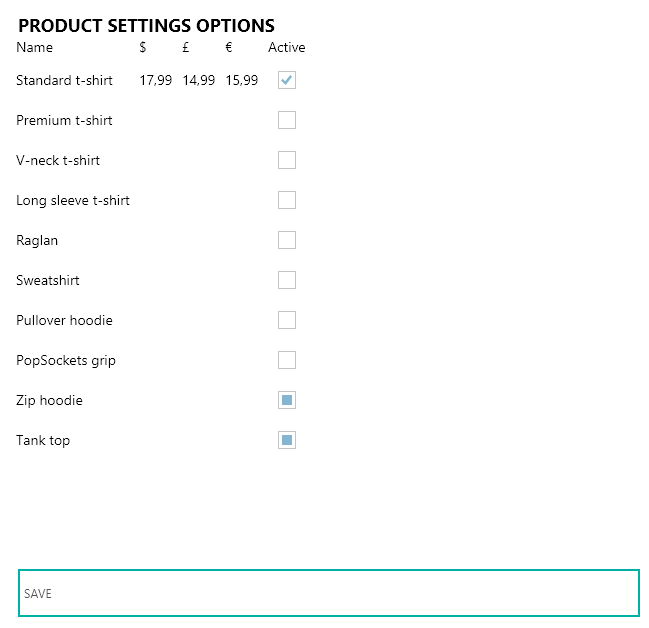
Under “Change Product Settings” you can select or deselect the desired products for your upload. Depending on which marketplace you would like to upload, you can adjust the price under the appropriate currency symbol.
Auto Login And Relog
Here you can enter your login details for your MBA account to permit LazyMerch to automatically log in. This prevents possible disruptions of your upload, if it gets logged out automatically during the uploading process.
Auto Resizer Option
Under the automatic resize tool you can find settings for Popsockets. With the percentual value “Popsocket Scale” you can determine to what size your design should be reduced. Additionally, you can select a background colour for your design, which you would like to have on the Popsocket.
Misc
Mis stands for Miscellaneous and offers you the option to delay the submission of the price quotation in milliseconds. With “Publish Option” you can decide, if the design should go online right way, or if it should first be saved as a draft.
Kindle Direct Publishing
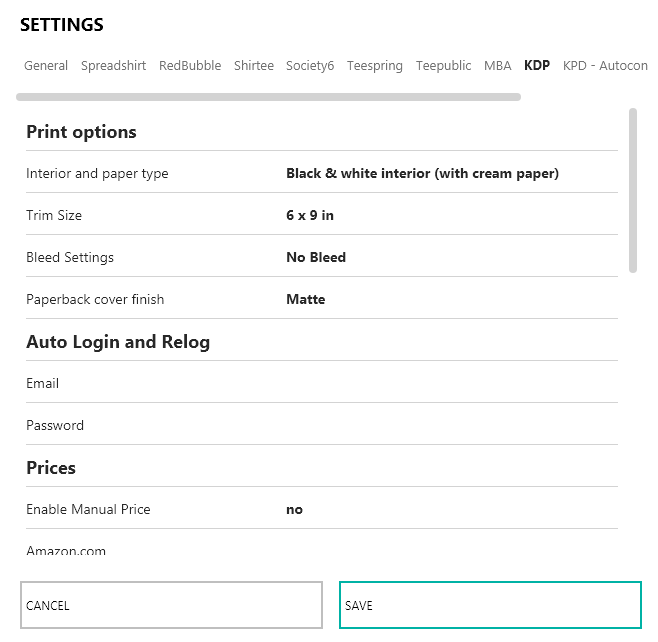
Print Options
Under Print Options you can set general settings for your paperback. This includes the paper type, the cut size, the bleed settings and the cover finish. Which setting you end up choosing, depends on your personal preferences. We recommend, that you make yourself familiar with the options on KDP to make sure you make the best choice on LazyMerch.
Auto Login And Relog
To prevent the upload to be disturbed by delays through the log out from your account, LazyMerch offers you to enter your login for KDP. This way, LazyMerch can run smoothly and automatically login to continue the upload.
Prices
KDP automatically determines the standard prices for the secondary market based on the price quotation of the primary market. Therefore, you have the option to “Enable Manual Price”, to be able to individually customize the prices for the secondary market. To do so, enable the setting with “yes” and enter the desired price at the underneath listed Amazon marketplaces.
Other
Preview Timeout
This value determines in seconds, how long LazyMerch should wait for the book preview. If the value is exceeded, the upload process for the book will be repeated. It will take into account the “Unexpected Error Retries” settings from the general settings.
Tag Seperator
Here you can enter the sign, which you use in the upload spreadsheet to separate tags. The settings and the symbol in the spreadsheet need to match so that LazyMerch can enter the tags correctly.
Uppercase Every Word In Subtitle
Every first letter of a word in a subtitle will be capitalised, if this option is activated.
Tabs
This value determines, how many tabs should be opened in the browser. The more tabs and threads, the quicker the upload process. It is best, to try out different variables first, to find out what works best for your device.
Expanded Distribution
Once this setting is activated, the expanded distribution of books will be connected with the primary market of Amazon.com.
Translate Title
Once this setting is activated, the title will be automatically translated into the language of the primary market.
Uppercase Every Word In Title
Every first letter of a word in the title will be capitalised, if this option is activated.
Threads
This value determines, how many browser windows should be opened. The more tabs and threads, the quicker the upload process. It is best, to try out different variables first, to find out what works best for your device.
Publish Option
Here you can choose, if the paperback should go online right away, or if it should be saved as a draft first.
Autoconverter
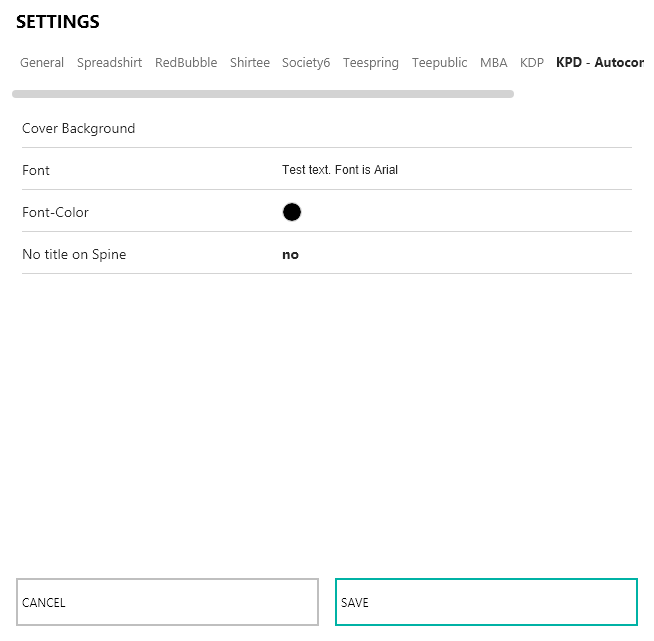
With the autoconverter, LazyMerch creates a book cover for KDP by using .png-files, which for example, initially were used for clothes on POD platforms. You can change the colour for the background of the cover. Under “Font” you can enter the text that should be on the cover (e.g. “Notebook”). Under “Font-Color” you can select its colour. “No Title on Spine” allows the printing of the spine of the book. The text written under “Font” will be used here and placed on the spine.

